
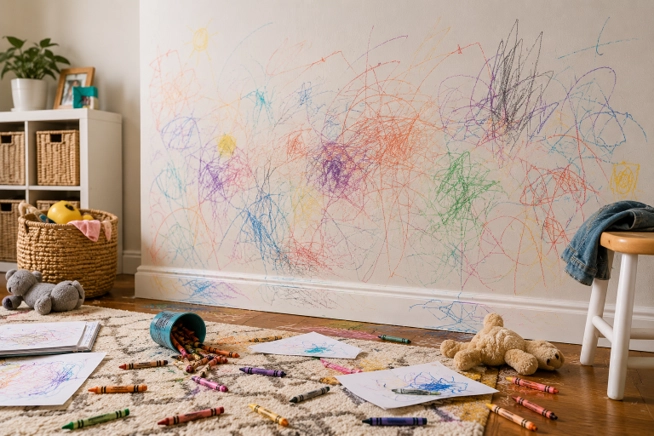
Crayon marks on walls can often be removed using gentle cleaning methods that won't damage painted surfaces. The best cleaning method depends on the type of paint, the size of the mark, and how long the crayon has been on the wall. Acting quickly and using the gentlest effective method can make removing crayon from walls easier while keeping your home looking its best. |
Whether your little artist got creative outside the coloring book or a stray crayon left an unexpected mark on the wall, the good news is that many crayon stains can be removed without damaging the finish using gentle cleaning methods and common household supplies.
The key is knowing where to start. Using the wrong cleaner or scrubbing too aggressively can sometimes do more harm than the crayon itself. By working through safe cleaning methods from the least aggressive to the strongest, you can often remove crayon marks while helping preserve your wall's finish.
Before You Start: Understanding Why Crayon Can Be Difficult to Remove from Walls
Before we get into how to remove crayon from your wall, you need to understand why it’s so difficult to remove. Crayons are designed to leave behind vibrant color, which is exactly why they're so much fun to use yet also why they can be challenging to remove from painted walls.
Most crayons are made with wax and colored pigments. When rubbed against a wall, the wax helps the color adhere to the painted surface. Depending on your paint finish, the wax may sit on top of the paint or settle into its texture, making some marks easier to remove than others.
Several factors can affect how easily crayon comes off your walls, including:
- The type of paint finish, such as flat, eggshell, satin, or semi-gloss.
- How long the crayon has been on the wall.
- Whether the marks are light scribbles or heavy coloring.
- The cleaning products and techniques you use.
Since every wall is a little different, always begin with the gentlest cleaning method before trying stronger solutions.
Gather Your Cleaning Supplies
You don't need a cabinet full of specialty products to remove most crayon marks. Having a few common cleaning supplies nearby can make the job easier while helping you avoid unnecessary damage to your walls.
|
Cleaning Supply |
Best Used For |
|
Microfiber cloth |
Gentle everyday cleaning |
|
Warm water |
Fresh or light crayon marks |
|
Mild dish soap |
Removing waxy residue |
|
Baking soda |
Stubborn crayon marks |
|
White vinegar |
Light residue on some painted surfaces |
|
Melamine foam cleaning pad |
Tough stains when used carefully |
|
Cotton swabs |
Corners, trim, and detailed areas |
|
Soft sponge |
Larger wall surfaces |
If you're using a new cleaning product, always read the manufacturer's directions before applying it to painted surfaces.
Quick Checklist Before Cleaning
Before you begin removing crayon from your walls:
- Test any cleaning product in an inconspicuous area.
- Start with the gentlest cleaning method first.
- Use a soft microfiber cloth or sponge.
- Avoid aggressive scrubbing that could damage the paint.
- Dry the wall after cleaning to prevent excess moisture from sitting on the surface.
These simple steps can help protect your walls while giving you the best chance of successfully removing the crayon marks.
Start with the Gentlest Cleaning Method
When it comes to removing crayon from painted walls, less is often more. Beginning with the mildest cleaning method reduces the risk of removing paint or changing the wall's finish.
Step 1: Wipe Away Surface Residue
Use a dry microfiber cloth to gently remove any loose wax or debris from the wall before introducing moisture.
Step 2: Mix Warm Water and Mild Dish Soap
Add a few drops of mild dish soap to a bowl of warm water. Dampen a clean microfiber cloth with the solution, making sure it isn't dripping wet.
Step 3: Clean Using Gentle Circular Motions
Lightly wipe the crayon marks using small circular motions. Avoid pressing too hard, especially on flat or matte paint, which can be more sensitive to abrasion.
Step 4: Rinse the Area
Dampen a second clean cloth with plain water and wipe away any soap residue.
Step 5: Dry the Wall
Use a dry microfiber cloth to gently dry the area. This helps prevent streaks and allows you to see whether additional cleaning is needed.
For many fresh crayon marks, this simple method may be all that's required.
If the marks remain, move to a slightly stronger cleaning method rather than increasing the amount of pressure you use. Gentle cleaning is typically more effective—and much safer for your paint—than aggressive scrubbing.
How to Remove Stubborn Crayon Marks
If warm water and dish soap don't completely remove the crayon, don't worry. Some marks—especially those that have been on the wall for a while or were applied heavily—may require a stronger cleaning method.
Rather than scrubbing harder, work your way through progressively stronger options until you find one that works. This approach helps reduce the risk of damaging your paint.
Try a Baking Soda Paste
Baking soda is a mild abrasive that can help lift wax residue without being as harsh as some commercial cleaning products are.
To use it:
- Mix a small amount of baking soda with water until it forms a paste.
- Apply the paste to a soft microfiber cloth instead of directly to the wall.
- Gently rub the crayon mark using light circular motions.
- Wipe away any residue with a clean, damp cloth.
- Dry the area with a microfiber towel.
Avoid scrubbing aggressively, as excessive friction may dull or remove certain paint finishes.
Use a Melamine Foam Cleaning Pad Carefully
A melamine foam cleaning pad can be effective for stubborn crayon marks, but it should be used with care. Since these cleaning pads work as a very fine abrasive, applying too much pressure or repeated scrubbing may remove paint or alter the wall's finish—particularly on flat or matte paint.
For the best results:
- Dampen the eraser according to the manufacturer's instructions.
- Test it on an inconspicuous area first.
- Use light pressure.
- Stop as soon as the crayon is removed.
If you notice paint transferring onto the eraser, discontinue use and try a gentler method instead.
Consider White Vinegar or a Wall Cleaner
Some homeowners have success removing light crayon residue with diluted white vinegar or a cleaner specifically designed for painted walls.
Before using any cleaning product:
- Read the manufacturer's directions.
- Test it in an inconspicuous location.
- Avoid mixing different cleaning products together.
- Follow the recommended contact time and rinsing instructions.
Using products as directed can help protect your walls while improving your chances of removing stubborn marks.
Know When to Stop
If a cleaning method isn't working after a few gentle attempts, resist the urge to scrub harder.
Repeated aggressive cleaning can sometimes damage the paint more than the crayon itself. Instead, move to the next appropriate cleaning method or consider whether touching up the paint may ultimately provide a better result.
Working patiently is often the safest approach for preserving your wall's finish.
What Not to Do When Removing Crayon from Walls
When faced with a stubborn crayon mark, it's understandable to want the quickest solution. However, certain cleaning habits can make the problem worse or permanently damage your walls.
Avoid these common mistakes:
- Scrubbing aggressively with excessive pressure.
- Using steel wool or other abrasive scrubbers.
- Saturating drywall with large amounts of water.
- Mixing household cleaning products together.
- Skipping a spot test before trying a new cleaner.
- Continuing to scrub if you notice paint coming off.
Taking a slower, gentler approach often produces better results than using stronger cleaners right away.
How to Help Prevent Future Crayon Marks
While crayon marks happen in many homes, a few simple habits can help reduce the chances of future wall art while encouraging creativity in more appropriate places.
Consider these ideas:
- Create a dedicated coloring station with easy access to paper and supplies.
- Store crayons, markers, and coloring books together so they're easy to find.
- Encourage children to use an easel, coloring pad, or craft table.
- Display completed artwork to celebrate creativity and reinforce drawing on paper.
- Keep washable crayons available when appropriate.
- Check walls periodically so fresh marks can be cleaned before they become more difficult to remove.
These small habits can help protect your walls while making cleanup easier if the occasional masterpiece appears outside the lines.
Did You Know?Fresh crayon marks are often easier to remove than older ones are. Cleaning them sooner rather than later may reduce the amount of effort needed and help preserve your wall's finish. |
When DIY Cleaning Isn't Enough
Many crayon marks can be removed with common household cleaning supplies, but some situations call for a different approach.
You may want to consider additional help if:
- Crayon covers multiple rooms or large wall surfaces.
- Previous cleaning attempts have damaged the paint.
- Marks remain visible after trying several gentle cleaning methods.
- You're preparing your home for guests, a special event, or a move.
- Cleaning crayon marks is just one task on a much longer household cleaning list.
In some cases, touching up or repainting the affected area may provide the best results particularly if repeated cleaning has altered the paint finish.
Professional cleaning may also be helpful if you're balancing wall cleaning with other household responsibilities and would rather spend your time on priorities that matter most.
Keep Your Walls Looking Their Best
Crayon marks on the wall can happen in almost any home, but they don't have to become a permanent part of your décor. Starting with the gentlest cleaning method, working patiently, and using the right supplies can often remove crayon without damaging your paint.
Just as important, creating simple habits—like encouraging designated art spaces and cleaning marks sooner rather than later—can help keep your walls looking cleaner over time.
If your home could use a little extra attention beyond spot cleaning, your local Molly Maid® cleaning professionals can help with recurring or one-time cleaning services that keep your home fresh, clean, and ready for everyday life. Whether you're tackling seasonal cleaning, preparing for guests, or simply looking to reclaim time in your busy schedule, professional cleaning can help you enjoy a cleaner home with less effort.
This article is intended for general guidance only and is not applicable to every situation. You are responsible for determining the proper course of action for your property and situation. Molly Maid is not responsible for any damages that occur as a result of advice and/or guidance derived from its blog content.