
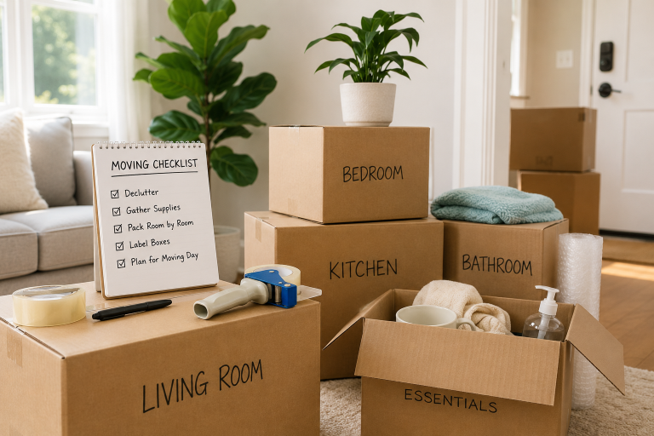
Packing for a move is easier when you start early, organize by room, and use sturdy supplies. Molly Maid® recommends:
These moving packing tips can protect belongings and make unpacking more manageable. |
Packing for a move becomes more manageable when you complete the work in the right order: declutter first, gather supplies, pack less-used areas, label every box, and keep daily essentials accessible until moving day. A room-by-room plan can also reduce misplaced belongings, overloaded boxes, and unnecessary cleaning at the end of the move.
Use the following moving packing tips, timeline, supply lists, and item-specific instructions to organize your home and prepare for a smoother move.
Pro TipKeep a small cleaning kit out until the end of your move. Include paper towels, trash bags, multipurpose cleaner, a vacuum or broom, and cleaning cloths so these supplies are not packed before the final walkthrough. |
Why Planning Ahead Makes Packing Easier
Start planning four to six weeks before moving day when possible. This gives you time to declutter, gather supplies, pack less-used belongings, and handle one room at a time. Removing items you no longer need can also reduce the number of boxes, packing materials, and trips required.
Before you start packing, take time to:
- Create a moving to-do list that incorporates a cleaning checklist and deadlines.
- Measure large furniture and confirm that it fits through doorways and in the new home.
- Sort belongings into keep, donate, sell, recycle, and discard piles.
- Schedule donation pickups or plan a garage sale.
- Gather boxes and packing supplies needed for the belongings you are taking.
Decluttering before packing can save time, reduce moving costs, and make unpacking much easier once you arrive at your new home.
Moving Timeline
|
When |
What to Do |
|
6–8 weeks before |
Confirm the move date, review mover restrictions, measure furniture, and begin decluttering. |
|
4–6 weeks before |
Gather supplies, arrange donations, and pack storage areas and seasonal belongings. |
|
2–3 weeks before |
Pack seasonal décor, books, guest rooms, extra linens, and infrequently used kitchen items. |
|
1 week before |
Pack most remaining items, confirm logistics, and prepare personal travel bags. |
|
24–48 hours before |
Pack bedding and daily items, charge devices, clean emptied spaces, and separate valuables. |
|
Moving day |
Keep essentials with you, complete a walkthrough, record utility readings, check every room, and secure your home before leaving. |
|
First 24 hours after |
Set up beds and bathrooms, unpack essential kitchen items, and remove empty packing materials. |
Packing over several weeks allows you to stay organized and gives you flexibility if unexpected tasks arise before moving day.
Checklist: Before You Seal the First Box
✔ Set aside documents, medications, valuables, and anything traveling with you
✔ Confirm what the moving company will not transport
✔ Designate areas for donations, recycling, and disposal
✔ Create a room-by-room packing order
✔ Choose a labeling and inventory system
✔ Assemble a cleaning kit that will remain unpacked
Gather Essential Packing Supplies
Having the right supplies before you begin can help protect your belongings while making packing faster and more efficient. Although it may be tempting to reuse worn boxes from previous moves, sturdy packing materials are often worth the investment.
Consider gathering these essentials before packing begins:
|
Packing Supply |
Purpose |
|
Sturdy moving boxes |
Protect belongings and allow boxes to be stacked securely. Use smaller boxes for heavy items and larger boxes for lightweight belongings. |
|
Packing tape |
Seals boxes securely during storage and transport. |
|
Permanent markers |
Make it easy to label each box with its destination room, contents, and handling instructions. |
|
Labels or color-coded tape |
Help movers and household members quickly identify where each box belongs. |
|
Packing paper or bubble wrap |
Cushions fragile belongings and helps prevent items from shifting or making contact inside boxes. |
|
Scissors |
Cut labels, packing paper, tape, and other packing materials. |
|
Resealable bags for hardware |
Keep screws, brackets, remote controls, and small furniture parts together. |
|
Small toolkit |
Provides basic tools for disassembling furniture and completing minor setup tasks after the move. |
|
Measuring tape |
Helps confirm that furniture, appliances, and packed items will fit through doorways and into the new space. |
|
Furniture blankets or pads |
Protect furniture surfaces, corners, and finishes from scratches and impact. |
|
Mattress bags |
Help protect mattresses from dirt, moisture, and damage during the move. |
|
Dish dividers |
Separate glasses, cups, and other breakable kitchen items inside specialty boxes. |
|
Corner protectors |
Help protect the corners of mirrors, frames, artwork, and furniture. |
|
Stretch wrap |
Secures furniture pads, drawers, cords, and loose components without applying tape directly to finished surfaces. |
|
Moving straps, when appropriate |
Help secure large items during transport or support handling when used by people familiar with the product’s instructions and limitations. |
|
Box cutter |
Opens sealed boxes efficiently. Cut only along shallow seams to avoid damaging the contents. |
Choosing boxes that match the weight of the items you're packing can also help prevent injuries. Heavy items like books belong in smaller boxes, while lighter items such as linens and pillows can be packed in larger ones.
Pack by Room and Frequency of Use
Trying to pack your entire house all at once can quickly become overwhelming. Instead of packing several areas at once, work through one room or category before moving to the next. Begin with belongings you are least likely to need before moving day and save daily essentials for last.
Pack first:
- Storage closets, attics, basements, or garage items
- Seasonal decorations and holiday items
- Archived files and stored paperwork
- Books and display items
- Guest-room belongings
- Extra linens and towels
Pack next:
- Wall décor and framed photos
- Specialty cookware and serving pieces
- Extra clothing and shoes
- Hobby supplies
- Home-office materials that are not needed daily
Pack last:
- Prescription medications
- Daily toiletries
- Work or school supplies
- Frequently used cookware
- Phone and device chargers
- Bedding and sleep essentials
- Pet food, medications, and daily supplies
As you pack each room:
- Remove anything being donated, sold, recycled, or discarded.
- Pack heavier belongings at the bottom of each box.
- Fill empty spaces so items do not shift.
- Keep belongings from the same room together whenever practical.
- Label the top and at least one side of every box.
- Record the box number and general contents in your inventory.
Packing in order of use helps prevent essential items from being sealed too early and makes it easier to find what you need before and immediately after the move.
Use a Simple Box-Labeling System
Give each room a color and each box a number. For example, kitchen boxes might use a yellow label and be numbered “Kitchen 1 of 8,” “Kitchen 2 of 8,” and so on. On the side and top of each box, include:
- Destination room
- General contents
- Box number
- “Open First” or “Fragile,” when applicable
Keep a basic inventory on your phone so you can identify which box contains an item without opening several boxes.
|
Pro Tip: Before disconnecting electronics or taking apart furniture, use your phone to photograph cable connections and assembly details. These photos can make setting everything back up much easier after your move. |
Protect Fragile and Valuable Items
Some belongings require a little extra care during a move. Taking the time to pack delicate items properly can help reduce the risk of damage while they're being transported.
To better protect fragile belongings:
- Select a sturdy box that closely fits the items being packed.
- Line the bottom and sides of the box with suitable cushioning.
- Wrap each fragile item individually with packing paper, foam, bubble wrap, or another material appropriate for the item’s surface and weight.
- Fill hollow items, such as glasses and vases, with packing paper.
- Place heavier, more durable pieces at the bottom.
- Wrap plates individually and position them upright like records, with cushioning below, between, and above them.
- Add packing material between layers and fill open spaces to prevent movement.
- Gently check the box for shifting before sealing it.
- Add more cushioning if movement is noticeable.
- Seal the box securely without making it too heavy to lift safely.
- Label the top and sides with the destination room and “Fragile” handling instructions.
Important documents, passports, prescription medications, jewelry, family heirlooms, and valuable electronics are often best transported with you instead of loading them onto the moving truck whenever possible.
How to Pack Common Household Items
Different household items require different packing techniques. Understanding the best way to pack specific belongings can help protect them during your move while making unpacking easier once you arrive.
|
Household Items |
Best Packing Method |
|
Dishes and glassware |
Wrap each piece individually with packing paper or bubble wrap and pack plates vertically to reduce the risk of breakage. |
|
Electronics |
Use the original packaging whenever possible. If unavailable, wrap electronics with protective padding and photograph cable connections before disconnecting them. |
|
Books |
Pack books in small boxes to prevent them from becoming too heavy to carry safely. |
|
Clothing |
Leave hanging clothes on hangers and place them inside wardrobe boxes or garment bags. Fold seasonal clothing into labeled boxes or suitcases. |
|
Small kitchen appliances |
Remove detachable parts, wrap cords separately, and cushion appliances with packing paper before boxing them. |
|
Lamps and mirrors |
Remove detachable pieces, wrap each item carefully, and clearly mark boxes as fragile. |
|
Framed artwork and photos |
Cover the surface with appropriate nonabrasive material, protect the corners with cardboard guards, and place the frame in a correctly sized picture or mirror box. Avoid placing adhesive or plastic bubble material directly against delicate painted surfaces. Store artwork upright rather than laying it flat. |
|
Mattresses |
Place mattresses in correctly sized mattress bags and follow the mover’s guidance for positioning, securing, and transporting them. |
|
TVs and monitors |
Use the original box when available or a properly sized electronics box with protective padding. Keep screens upright and avoid placing pressure against them. |
|
Knives and sharp utensils |
Wrap blades securely, protect sharp edges, and place the items in a clearly labeled box so they can be unpacked carefully. |
|
Furniture hardware |
Place screws, bolts, brackets, and assembly instructions in a labeled resealable bag and attach or store it with the corresponding furniture when practical. |
|
Houseplants |
Place plants in sturdy containers, protect them from extreme temperatures, and confirm transportation restrictions before moving day. |
Packing similar items together and selecting appropriately sized boxes helps keep your belongings organized while reducing the chance of damage during transport.
Avoid Common Packing Mistakes
A few preventable mistakes can make packing, loading, and unpacking more difficult. Use the following approaches to stay organized and protect your belongings:
|
Packing Mistake |
Better Approach |
|
Waiting until the final days |
Begin with storage and seasonal items several weeks ahead. |
|
Using one box size for everything |
Use small boxes for heavy items and larger boxes for lightweight belongings. |
|
Writing only the room name |
Add the room, contents, box number, and handling instructions. |
|
Leaving gaps in fragile boxes |
Fill open space so belongings cannot shift. |
|
Mixing several rooms |
Keep boxes assigned to one destination whenever practical. |
|
Packing restricted materials |
Obtain the mover’s prohibited-items list before packing. |
|
Packing every cleaning tool |
Keep a final cleaning kit accessible. |
|
Sealing boxes too early |
Verify the contents and inventory number before taping. |
Items to keep with you, confirm with your mover, or dispose of
|
Keep with You |
Confirm with Your Mover |
Dispose of Properly |
|
Identification and passports |
Houseplants |
Gasoline and other fuels |
|
Prescription medications |
Perishable or refrigerated food |
Propane cylinders |
|
Keys and closing documents |
Large or specialty batteries |
Paint, solvents, and thinners |
|
Financial and legal records |
Specialty or oversized equipment |
Flammable or combustible materials |
|
Jewelry and family heirlooms |
Cleaning products not clearly prohibited |
Chemicals restricted by the mover or local regulations |
|
Small, high-value electronics and data-storage devices |
Items containing fuel or oil |
Damaged batteries or hazardous electronic waste |
Moving companies may restrict additional items based on the company, type of move, destination, or applicable regulations. Request a current written prohibited-items list before packing. Follow local disposal instructions for fuels, chemicals, batteries, paint, and other potentially hazardous materials rather than placing them in household trash.
Packing Tips for Moving with Pets
Moving can disrupt a pet’s routine, so plan ahead to keep essential supplies accessible and create a safe space away from packing activity.
Before moving day:
- Pack food, medications, treats, bowls, toys, bedding, leashes, and waste supplies in a clearly labeled bag.
- Keep feeding, walking, and play schedules as consistent as possible.
- Update identification tags and microchip information with your new contact details.
- Complete any necessary veterinary appointments and obtain copies of important records.
- Confirm any pet-related travel or lodging requirements for a long-distance move.
On moving day, keep pets in a quiet, secure room away from open doors and moving activity, or arrange for a trusted person to care for them. Transport pets with you rather than in the cargo area of a moving truck.
After arriving, set up a familiar space with your pet’s bedding, food, water, and favorite toys. Introduce the new home gradually and return to normal routines as soon as practical to help your pet adjust.
24 Hours Before Moving Day
During the final 24 hours, focus on essential logistics, items staying with you, and the last belongings that still need to be packed:
- Confirm mover arrival times, addresses, parking instructions, and contact information.
- Separate identification, medications, documents, valuables, keys, and travel bags.
- Charge phones and other necessary devices.
- Pack remaining toiletries, bedding, and daily-use belongings.
- Place cold drinks, snacks, and basic moving-day supplies where they will remain accessible.
- Set aside the cleaning supplies needed for the final walkthrough.
- Photograph utility readings and the condition of the home, when appropriate.
- Confirm that pets and children have a safe moving-day plan.
- Clearly mark everything that should not be loaded onto the moving truck.
How to Clean Your Home While Packing
Packing and cleaning naturally go hand in hand. Packing and cleaning are easier when completed together. As each room becomes empty, you can access shelves, cabinets, floors, baseboards, and other areas that are normally blocked by belongings or furniture.
Follow this order in each room:
- Remove and sort all belongings.
- Pack everything that is moving to the new home.
- Remove donations, recycling, and trash.
- Dust ceiling corners, shelves, ledges, and other high surfaces.
- Wipe empty cabinets, drawers, and closets.
- Clean doors, cabinet handles, light switches, and other frequently touched surfaces.
- Clean windowsills, trim, and baseboards.
- Move furniture out of the room.
- Vacuum, sweep, or mop the exposed floor.
- Close the room or mark it as complete to prevent additional traffic.
Keep one bathroom and any other necessary living area operational until the final stage of the move. Complete the final kitchen and bathroom cleaning after daily-use items have been packed.
To avoid packing cleaning supplies too early, create three clearly marked areas:
- Pack: Belongings that will be loaded onto the moving truck
- Clean: Supplies needed for the remaining cleaning
- Do Not Load: Documents, valuables, medications, travel bags, and other items staying with you
Keep trash bags, paper towels, cleaning cloths, multipurpose cleaner, a broom or vacuum, and basic bathroom supplies accessible until the final walkthrough.
Use move-in and move-out cleaning checklists
A move-out cleaning checklist can help ensure that cabinets, closets, fixtures, and floors are not overlooked before you hand over the keys. At your new home, a move-in cleaning checklist can help you prioritize surfaces and spaces that are easiest to clean before furniture and boxes arrive.
Prepare a First-Night Box and Personal Travel Bag
After spending hours loading boxes, traveling, and unloading your belongings, the last thing you'll want to do is search through dozens of boxes looking for a toothbrush or phone charger.
Prepare two separate groups of essentials: a personal travel bag that stays with you and a clearly marked first-night box that is transported in your vehicle or loaded last and unloaded first. This keeps critical items secure while making household essentials easy to access after arrival.
Keep with you:
- Identification and travel documents
- Prescription medications
- Wallet, keys, and closing documents
- Jewelry and irreplaceable valuables
- Phone, chargers, and necessary electronics
- Change of clothes and basic toiletries
- Important pet records and medications
- Water, snacks, and other travel necessities
Load last and open first at the new home:
- Toilet paper and hand soap
- Towels and basic toiletries
- Bedding and pillows
- Necessary medications and first-aid supplies
- Trash bags and paper towels
- Basic dishes, utensils, and a can opener
- Coffee or tea supplies
- Basic tools
- Pet food, bowls, litter, and other immediate supplies
- Children’s comfort items, when applicable
Many homeowners also find it helpful to pack a small supply of all-purpose cleaner, disinfecting wipes, or paper towels so they can quickly wipe down surfaces before unpacking.
|
Moving Day Tip Place the essentials box in your personal vehicle or load it last so it can be unloaded first. Mark it clearly on multiple sides and make sure everyone helping with the move knows that it should remain accessible. |
Make Unpacking More Manageable
Unpacking often feels like the final hurdle after a move, but having a plan can make the process much less overwhelming.
Rather than opening every box at once, focus on making your home functional first. Prioritize the rooms you'll use immediately, such as the kitchen, bathrooms, and bedrooms, before moving on to decorative items and less frequently used spaces.
As you unpack:
- Inspect the home and document any existing damage.
- Clean priority surfaces before placing belongings.
- Make one bathroom functional.
- Set up beds and essential sleeping areas.
- Unpack medications, toiletries, chargers, and personal necessities.
- Set up pet or child essentials, when applicable.
- Unpack basic kitchen supplies and food.
- Assemble necessary furniture.
- Work through one room at a time.
- Flatten boxes and collect packing materials as you go.
Remember that unpacking is part of settling into your new home. Working through one room at a time can help the process feel more organized and far less stressful.
A Well-Planned Move Starts with Smart Packing
A smoother move starts with a practical order of operations: declutter, gather supplies, pack less-used belongings first, label boxes clearly, protect fragile items, and keep daily essentials accessible. Cleaning each room as it becomes empty can also reduce the amount of work left for moving day.
Professional cleaning can take one major responsibility off your list. Your local Molly Maid® cleaning professionals can provide move-in or move-out cleaning services based on local availability, helping you prepare your former home for its next occupants or clean your new space before unpacking. Contact your local Molly Maid to request an estimate.
This article is intended for general guidance only and is not applicable to every situation. You are responsible for determining the proper course of action for your property and situation. Molly Maid is not responsible for any damages that occur as a result of advice and/or guidance derived from its blog content.